Napoleon Cake Recipe with 10 Irresistible Creamy Layers

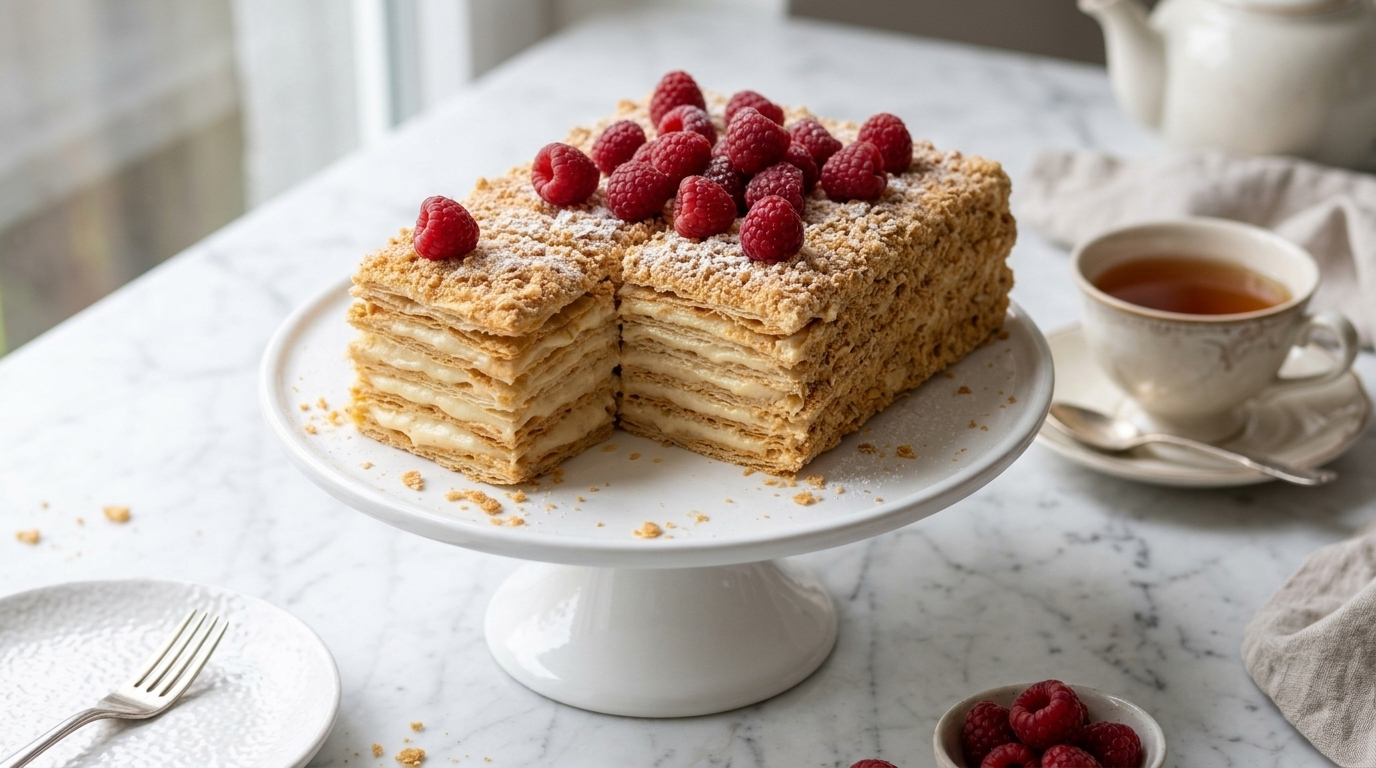
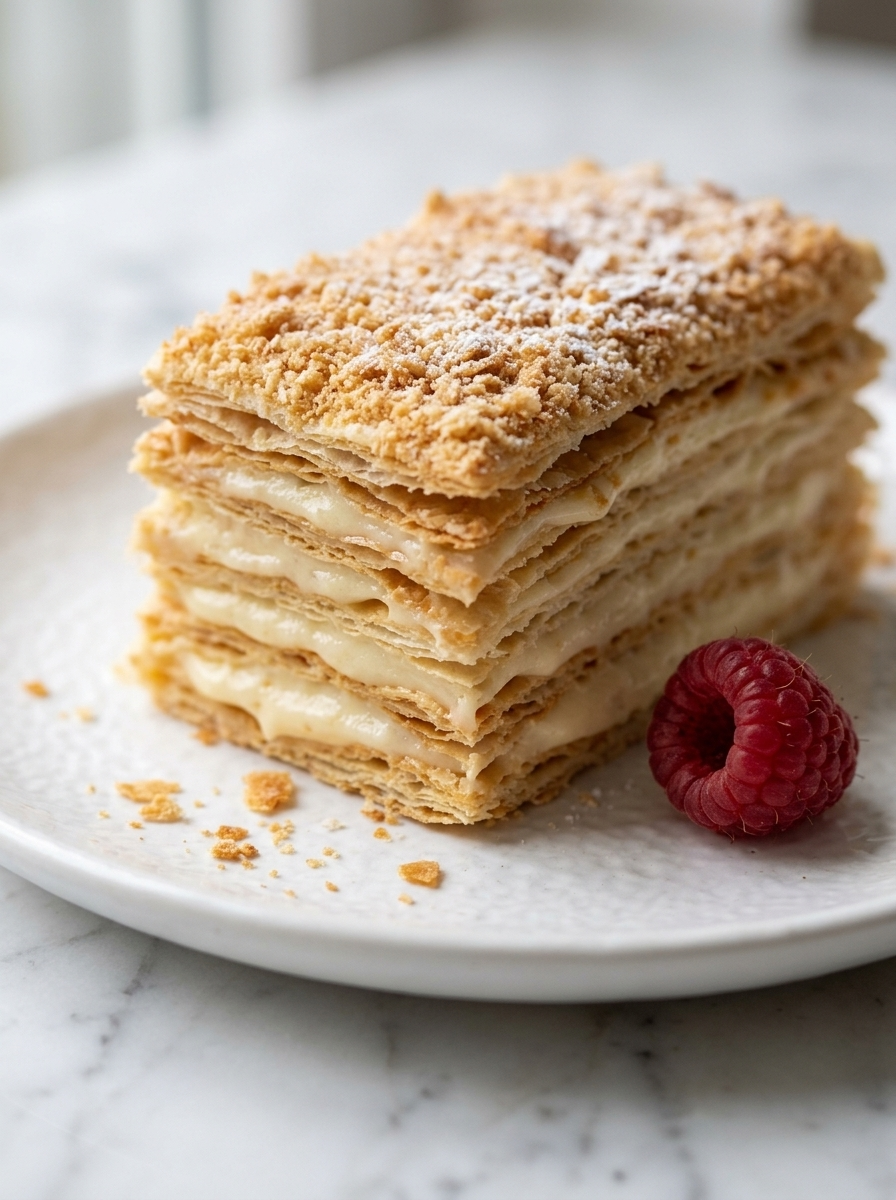
This Napoleon cake recipe builds ten paper thin, golden layers with silky vanilla custard and a buttery crumb coating for a bakery-style celebration dessert. This Napoleon cake starts shatter crisp, then softens overnight into tender, creamy layers that melt as you cut them.
My first attempt was a heavy, soggy stack. The layers puffed unevenly, the custard turned lumpy, and the whole cake slumped on the plate. After six test bakes, three fixes made the difference: grated frozen butter in the dough, a cornstarch thickened custard cooked until it bubbles, and a full 8 hour rest in the fridge.
What makes this version different is the simple dough. It uses sour cream, so it rolls out without a laminating routine, and a fork pricks the layers flat. Folding whipped cream into the custard keeps it light, not heavy. My grandmother, who has made Napoleon cake for forty birthdays, tasted a slice and asked who taught me.
Table of Contents
Why You’ll Love This Napoleon Cake Recipe
- Ten crisp, buttery layers that melt into tender sheets after a night in the fridge
- Silky vanilla custard cream lightened with whipped cream, so it tastes rich but never heavy
- No laminating or folding, since the sour cream dough rolls out easily
- Make ahead friendly, since the cake needs a full night to soften anyway
- Easy to serve a crowd, with 16 generous slices from one tall cake
- Easy to customize, with raspberry jam, dulce de leche, or chocolate custard
Quick Information
- Prep Time: 1 hour
- Chill Time: 1 hour for the dough
- Cook Time: 45 minutes
- Cool Time: 2 hours for the custard
- Soak Time: At least 8 hours
- Total Time: About 12 hours 45 minutes, mostly hands off
- Servings: 16
- Difficulty: Medium
- Calories: 415 per serving
- Important Tool: A rolling pin and an 8 inch plate or pan for trimming
- Best For: Birthdays, anniversaries, holidays, or any make ahead celebration
- Course: Dessert
- Cuisine: Russian
- Category: Desserts & Baking
Nutrition Information
- Calories: 415
- Protein: 7g
- Carbohydrates: 40g
- Fat: 25g
- Fiber: 1g
- Sugar: 17g
- Sodium: 130mg
- Serving Size: 1 slice (about 1/16 of the cake)
- Servings Per Recipe: 16
This Napoleon cake is a rich celebration dessert, with most of the calories coming from the butter, cream, and egg yolks. A thinner slice with fresh raspberries makes a lighter portion, and the cake is less sweet than many frosted layer cakes.
Nutrition information is an estimate calculated from standard ingredient values and will vary based on specific brands and portion sizes used.
Ingredients
For the Dough Layers
- 3 1/4 cups (410g) all purpose flour, plus more for dusting
- 1/2 teaspoon fine salt
- 1 cup (226g) unsalted butter, frozen, for grating
- 1 large egg, cold
- 1/2 cup (120g) full fat sour cream, cold
- 1 teaspoon white vinegar
- 3 to 4 tablespoons (45 to 60ml) ice water
For the Custard Cream
- 4 cups (960ml) whole milk, divided
- 1 cup (200g) granulated sugar
- 6 large egg yolks
- 1/2 cup (65g) cornstarch
- 4 tablespoons (57g) unsalted butter, softened
- 2 teaspoons alcohol free vanilla extract
- 1/4 teaspoon fine salt
- 1 cup (240ml) cold heavy cream
- 2 tablespoons powdered sugar
For Finishing
- Crumbs from the baked dough scraps
- Fresh raspberries, optional
- Powdered sugar, for dusting, optional
Ingredient Notes: Freeze the butter for at least 1 hour so it grates into small shards, which melt into flaky pockets in the oven. I tested this with Kerrygold butter and Daisy sour cream, and both gave a rich, tender result. Use whole milk and full fat sour cream, since lower fat versions make a thinner custard and a drier dough.
Tip: Save the 6 egg whites in the fridge for up to 4 days, and use them for omelets or meringues.
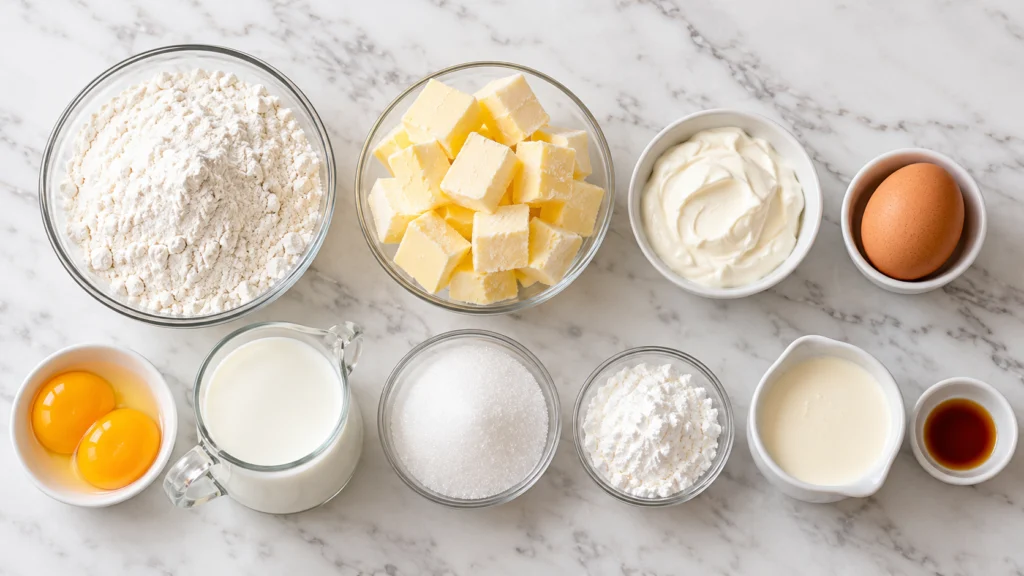
Equipment Needed
- Box grater: shreds frozen butter into the flour for crisp, flaky layers
- Rolling pin: rolls the dough paper thin and even
- 8 inch cake pan or plate: guides clean trimming of every layer
- Fine mesh sieve: strains the custard silky and smooth
- Offset spatula: spreads the cream in even layers
- Digital kitchen scale: divides the dough into 10 equal pieces
Practical Tip: Trim each layer the moment it comes out of the oven. Hot layers cut cleanly with a knife, while cooled layers shatter into shards.
Preparation
Freeze the butter for 1 hour, and keep the egg, sour cream, and ice water in the fridge until you need them. Line 2 large baking sheets with parchment paper, and preheat the oven to 400°F (200°C) when the dough has chilled.
Separate the eggs, save the whites, and measure the milk, sugar, and cornstarch for the custard. Set a fine mesh sieve over a bowl, and keep an 8 inch plate nearby as a trimming guide.
Step by Step Instructions
- Make the dough. Whisk the flour and salt, then grate the frozen butter into the bowl and toss with your fingertips until the shards are coated. Stir the egg, sour cream, and vinegar together, add it with 3 tablespoons of ice water, and mix until a shaggy dough forms that holds when pinched. Chef’s Note: Keep the butter frozen until you are ready to grate it.
- Chill and divide. Weigh the dough, divide it into 10 equal pieces, about 85g each, and shape them into flat discs. Wrap and chill for 1 hour, until the dough feels firm and cool.
- Cook the custard. Whisk the yolks, sugar, and cornstarch with 1/2 cup of the milk until smooth, then heat the remaining milk until steaming. Whisk the hot milk into the yolks in a slow stream, return everything to the pot, and cook over medium heat, whisking constantly, 5 to 7 minutes, until thick and bubbling, then cook 1 minute more. Stir in the butter, vanilla, and salt, strain through a sieve, press plastic wrap onto the surface, and chill for 2 hours.
- Roll and bake the layers. Preheat the oven to 400°F, roll each disc on parchment into a 9 inch round about 1/16 inch thick, and prick it all over with a fork. Bake each layer for 5 to 7 minutes, until deep golden, then trim it to 8 inch using a plate while still hot, and save the scraps. Chef’s Note: Prick every 1/2 inch to help the layers bake flat.
- Whip and fold the cream. The hot-trimmed scraps are already baked; return them to the oven only if pale, watching closely until golden. Cool the layers and scraps completely, then crush the scraps into fine crumbs. Whip the cold cream and powdered sugar to stiff peaks, whisk the chilled custard smooth, and fold the cream into the custard in two additions until light and fluffy. Chef’s Note: Both the custard and baked layers must be completely cool before assembly.
- Assemble the cake. Set one layer on a serving plate and spread about 1/2 cup of cream evenly over it. Repeat with the remaining layers, then cover the top and sides with the leftover cream.
- Soak and decorate. Press the crumbs onto the sides and top, then cover loosely and refrigerate for at least 8 hours, or overnight. The cake is ready when the layers feel soft and cut easily with a serrated knife.
Expert Tips & Tricks
- Freeze the butter. Grated frozen butter melts in the oven, leaving tiny air pockets that make each layer shatter crisp and then soften evenly.
- Learn from my mistake. My first batch skipped the fork pricking, and the layers puffed up like little pillows and would not stack. Pricking every 1/2 inch kept them flat.
- Cook the custard until it bubbles. The cornstarch only thickens fully at a boil, and this is what keeps the custard from weeping.
- Make ahead. Bake the layers up to 3 days early and store them airtight, and assemble the cake the night before serving.
- Store the cake loosely covered. A tall cake dome in the fridge keeps the crumbs dry and the sides neat.
- Rest it overnight. The cream seeps into the layers over 8 hours, turning crisp pastry into tender, cake like sheets.
- Save time. Bake one pan while you roll the next layer, and make the custard while the dough chills.
Common Mistakes & Troubleshooting
Layers puff up and bubble: Unpricked dough, or butter that melted into the flour, makes the layers rise unevenly. Prick every 1/2 inch and keep the butter frozen. If a layer puffs, press it flat with a spatula as soon as it leaves the oven, or use it in the middle of the stack.
Tough, chewy layers: Overworking the dough, rolling too thick, or underbaking leaves the layers tough. Mix just until the dough holds and roll to 1/16 inch. If the cake is chewy, let it rest another 8 hours or spoon on a little extra cream.
Lumpy or runny custard: Scrambled yolks cause lumps, and undercooked cornstarch makes it runny. Add the hot milk slowly, whisk constantly, and let it bubble for a full minute. Strain lumpy custard, or return a runny custard to the heat with 1 tablespoon of cornstarch mixed with cold milk.
Cake leans or slides: Warm custard, uneven layers, or too much cream per layer make the stack slip. I assembled my first cake with lukewarm custard, and the layers slid off like a deck of cards. Chill the custard fully, use about 1/2 cup per layer, and chill the cake 30 minutes before pressing on the crumbs.
Layers stay crisp after a night: Too little cream or layers that are too thick keep the cake from softening. Roll thin and spread the cream evenly to the edges. Rest the cake for another 8 to 12 hours, covered, to finish softening.
Storage Instructions
- Room Temperature: Do not leave the cake out longer than 1 hour, since the cream contains eggs and dairy.
- Refrigerator: Store covered for up to 3–4 days; the cake tastes best on days 2 and 3.
- Freezer: Freeze the baked, unfilled layers, stacked with parchment between, for up to 2 months. Freeze finished slices, wrapped tightly, for up to 1 month.
- Reheating: Not applicable, since this cake is served cold. Take slices out 15 minutes before serving for the creamiest bite.
- Make Ahead: Bake the layers up to 3 days ahead, and assemble the cake the night before serving.
- My storage tip: I freeze single slices on a tray for an hour, then wrap each one, so a piece of cake is always waiting.
Variations & Substitutions
- Warm spiced version: Add 1/2 teaspoon ground cinnamon and 1/4 teaspoon cardamom to the dough.
- Mild, kid friendly version: Fold 1/2 cup of mini chocolate chips into the cream, and top with sprinkles.
- Vegetarian version: The recipe is already vegetarian, since it has no gelatin or meat ingredients.
- Gluten free version: Use a 1:1 gluten free baking flour blend with xanthan gum, and chill the dough for 1 1/2 hours.
- Jam version: Spread 2 tablespoons of seedless raspberry jam between every other layer.
- Chocolate version: Whisk 1/3 cup of melted dark chocolate into the hot custard before chilling.
- Other substitutions: Replace the custard with 2 cans of cooked dulce de leche folded into whipped cream, use store bought puff pastry for a faster cake, or scale down all the ingredients for a smaller cake.
Serving Suggestions
Napoleon cake is best served cold, in thin slices, with something fresh and a hot drink.
- Garnishes: Fresh raspberries, a dusting of powdered sugar, or a few extra crumbs
- Sauces: A drizzle of raspberry sauce or warm caramel
- Drinks: Hot black tea, strong coffee, or a silky matcha latte for a creamy pairing
- Fresh pairings: Serve beside a fresh and colorful fruit bowl to cut the richness
- Dessert tables: Set next to an Ultimate Apple Pie for a holiday spread with two classics
- Meal combinations: Explore more dessert and baking recipes for other celebration favorites
Meal Prep Tip: I bake the layers on Saturday, assemble the cake that night, and serve it on Sunday, so the cake has a full 24 hours to soften.
Frequently Asked Questions
Can I make the custard cream a day ahead?
Yes, the custard keeps for 2 days in the fridge with plastic wrap pressed on the surface, which prevents a skin. Whisk it smooth for 30 seconds before using, since it sets firm in the cold. Whip and fold in the heavy cream only on the day you assemble, so it stays light and airy. If the custard looks lumpy after chilling, push it through a fine mesh sieve, and your Napoleon cake layers will spread evenly.
Why does my Napoleon cake custard taste eggy or starchy?
An eggy taste means the yolks overcooked, and a starchy taste means the cornstarch never fully cooked. Whisk constantly over medium heat, then let the custard bubble for a full 1 minute, which activates the cornstarch and removes the raw flavor. Strain it right away to catch any cooked egg bits, add the vanilla off the heat, and chill with plastic wrap on the surface. A properly cooked custard makes your Napoleon cake taste creamy and clean.
Can I use store bought puff pastry for Napoleon cake?
Yes, thaw 2 sheets of puff pastry, roll each slightly thinner, and cut each into 3 equal rectangles to make 6 layers. Prick them all over, set parchment and a second baking sheet on top to keep them flat, and bake at 400°F for 15 to 18 minutes, until deep golden. Stack with the same custard cream. The cake tastes more like French mille feuille, flakier and lighter, and needs only 4 hours to soften.
How long do I bake the layers, and can I bake two pans at once?
Bake each layer at 400°F for 5 to 7 minutes, until deep golden with no pale spots. Two pans fit at once, one on the upper third and one on the lower third, so rotate them at the 3 minute mark. Plan on about 35 minutes for all 10 layers in 5 batches. Trim each layer while hot, since cooled layers shatter. Pale layers stay chewy, so pull them only when they look golden.
Is Napoleon cake the same as mille feuille?
No, though they share a name and a custard filling. French mille feuille, sometimes called a Napoleon in the United States, is built from 3 layers of puff pastry with pastry cream, and it is eaten crisp. This Napoleon cake uses 10 thin, crisp layers with a lighter cream and rests overnight to soften. Legend ties the cake to the 1912 centennial of Russia’s victory over Napoleon’s army, with pieces cut into triangles like the emperor’s hat.
Conclusion
The best Napoleon cake is the one you build the night before and forget about. The fridge does the real work, turning crisp layers into something tender and cloud soft, and by morning the hard part is long over.
I made this cake for my parents’ anniversary last spring, and my mother cut the first slice slowly, the way she does when something matters. She finished it, set down her fork, and asked me to write the recipe in her notebook.
Bake it once as written, then change the cream. Dulce de leche or a layer of raspberry jam gives this Napoleon cake a new personality each time.
For more easy dessert and baking recipes like this one, follow along on Pinterest at MyRecipesDiary.

Napoleon Cake Recipe
Ingredients
Equipment
Method
- Whisk the dough flour and salt. Grate in the frozen butter and toss to coat. Mix the egg, sour cream, and vinegar, then add with 3 tablespoons ice water. Mix just until the dough holds together, adding the remaining water only if needed.
- Divide into 10 equal pieces, shape into discs, wrap, and chill for 1 hour.
- Whisk the yolks, sugar, and cornstarch with 1/2 cup milk until smooth. Heat the remaining milk until steaming. Slowly whisk the hot milk into the yolk mixture, then return it all to the saucepan. Cook over medium heat, whisking constantly, until thick and bubbling, then cook for 1 minute more.
- Stir in the custard butter, vanilla, and salt and strain into a shallow heatproof container. Press food-safe plastic wrap onto the surface and refrigerate for about 2 hours, until completely cold.
- Preheat the oven to 400°F (200°C). Roll each dough disc on parchment into a 9 inch round, prick all over with a fork, and bake for 5 to 7 minutes until golden. Bake in batches; rotate trays if baking two at once.
- Trim each hot layer to 8 inches. Save the baked scraps; toast them further only if pale, watching closely. Cool all layers and scraps completely, then crush the scraps into crumbs.
- Whip the cold heavy cream with the powdered sugar to stiff peaks. Whisk the cold custard smooth, then gently fold in the whipped cream in two additions.
- Stack the layers with about 1/2 cup custard cream between each, reserving enough to coat the top and sides. Coat the cake and gently press on the crumbs.
- Cover and refrigerate for at least 8 hours before slicing. Garnish with raspberries or powdered sugar if desired.
Notes
- Trim the layers while they are hot so they cut cleanly.
- Chill the custard completely and cool the pastry layers before assembling.
- Rest the cake for at least 8 hours so the layers soften.
- Allow 1 hour for dough chilling and about 2 hours for custard cooling. Some tasks can overlap. Freeze the dough butter before starting.