Katsu Curry Recipe

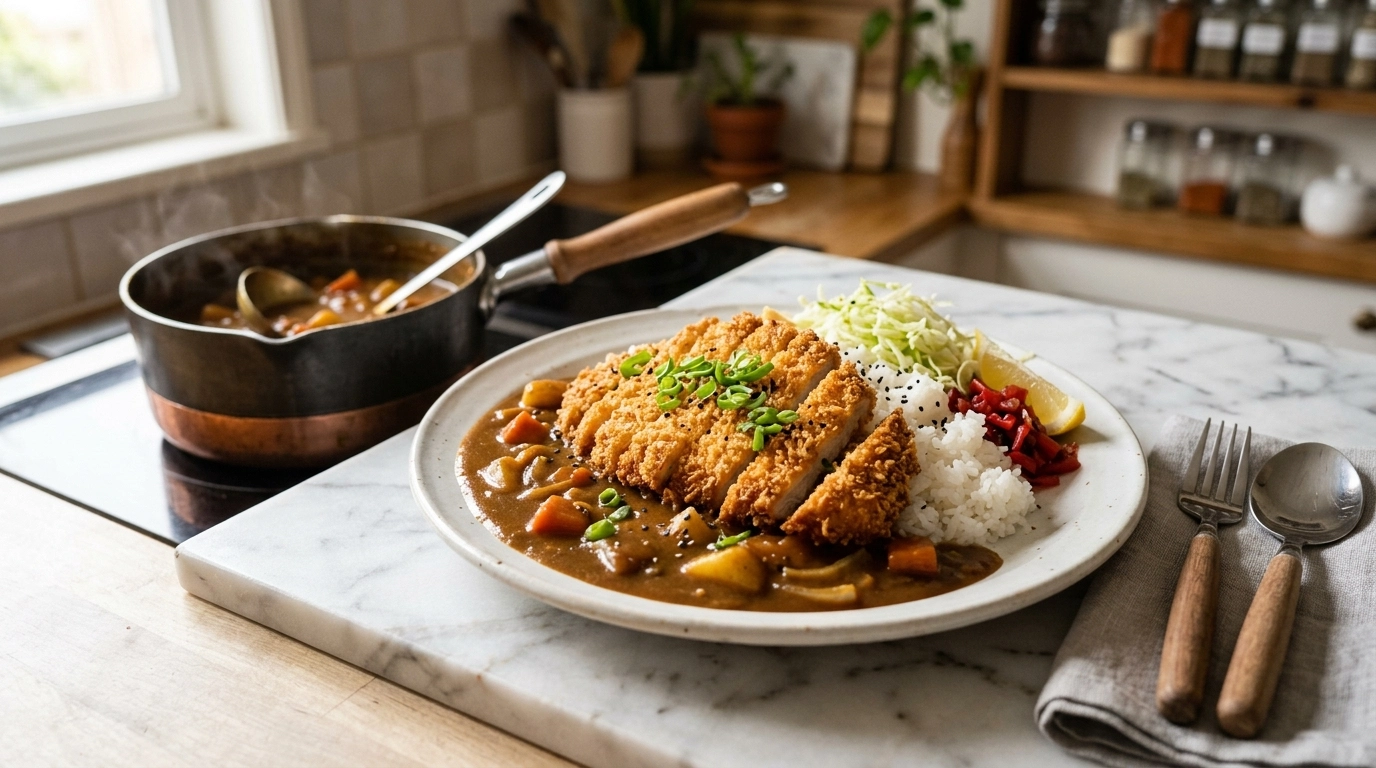
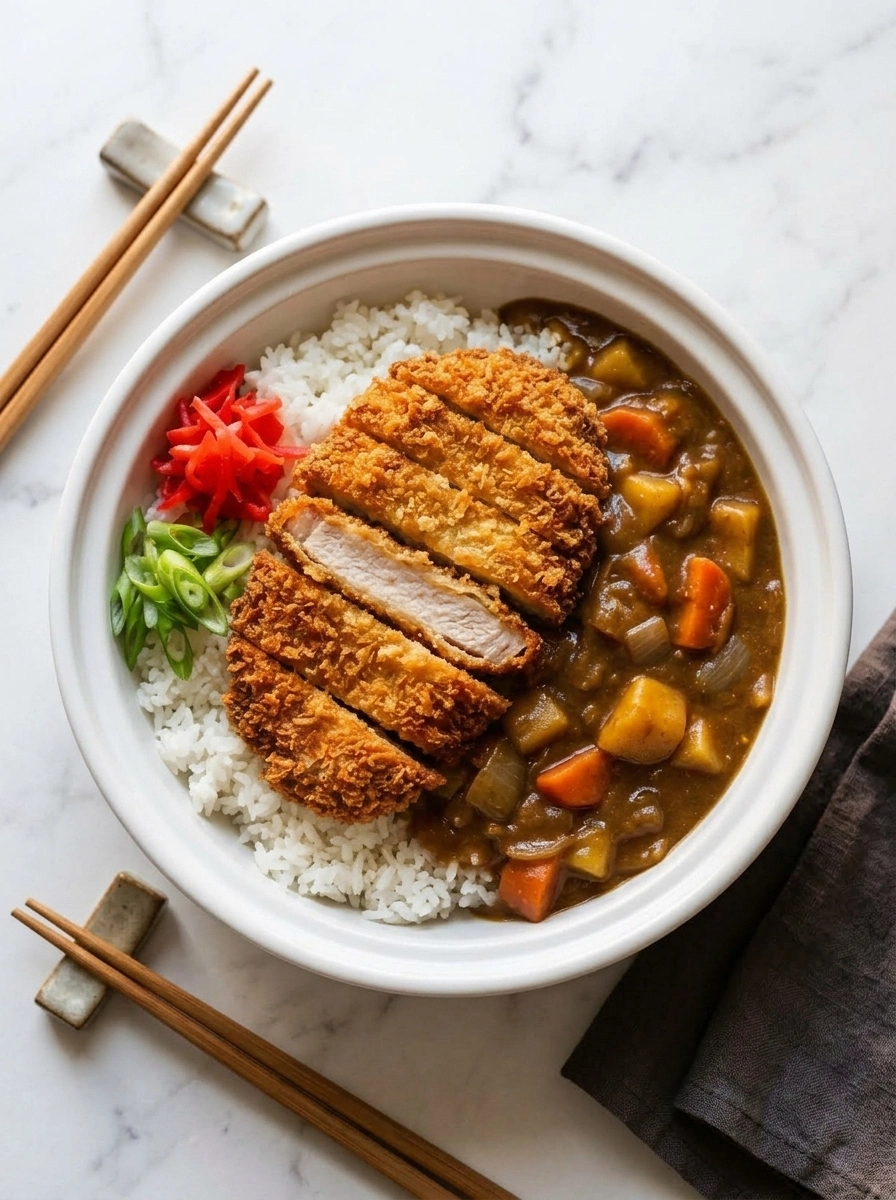
A crispy, golden cutlet sliced open next to a pool of glossy, mildly sweet curry sauce is the kind of plate that makes ordering delivery feel completely unnecessary once you see how manageable it is at home. Katsu Curry layers a panko breaded chicken cutlet over steamed rice, then finishes it with a rich, gently spiced Japanese curry sauce built from a simple homemade roux.
I used to think the curry sauce was the hard part of this dish, until I realized it comes together with the same basic technique as a gravy, just with curry powder and a grated apple stirred in for warmth and natural sweetness. The chicken itself only needs a proper breading station and a hot pan to turn out shatteringly crisp every time. Once you have made katsu curry at home a couple of times, that specific mix of crunchy cutlet and silky curry sauce stops feeling like something only a restaurant kitchen can pull off.
Homemade Katsu Curry
Why You’ll Love This Japanese Katsu Curry
- Shatteringly crispy chicken, thanks to a proper panko breading
- Rich, gently spiced curry sauce built on a simple homemade roux
- Restaurant style meal, made entirely with pantry friendly ingredients
- Ready in about 50 minutes, faster than most delivery orders
- Naturally kid friendly, mild enough for most palates as written
- Easy to customize, from the spice level to the protein you use
Quick Information
- Prep Time: 20 minutes
- Cook Time: 30 minutes
- Total Time: 50 minutes
- Servings: 4
- Difficulty: Medium
- Calories: 620 per serving
- Important Tool: A large skillet for frying
- Best For: Weeknight dinners, comfort food cravings, or introducing Japanese home cooking
- Course: Main Course
- Cuisine: Japanese
- Category: Main Dishes
Nutrition Information
- Calories: 620
- Protein: 34g
- Carbohydrates: 58g
- Fat: 26g
- Fiber: 3g
- Sugar: 8g
- Sodium: 780mg
- Serving Size: 1 cutlet with curry and rice
- Servings Per Recipe: 4
The chicken provides most of the protein in this katsu curry, while the rice and curry sauce round out the carbohydrates that make the dish so filling. Choosing a lower sodium broth for the curry sauce is an easy way to bring the sodium down slightly without losing flavor.
Nutrition information is an estimate calculated from standard ingredient values and will vary based on specific brands and portion sizes used.
Ingredients
For the Chicken Katsu
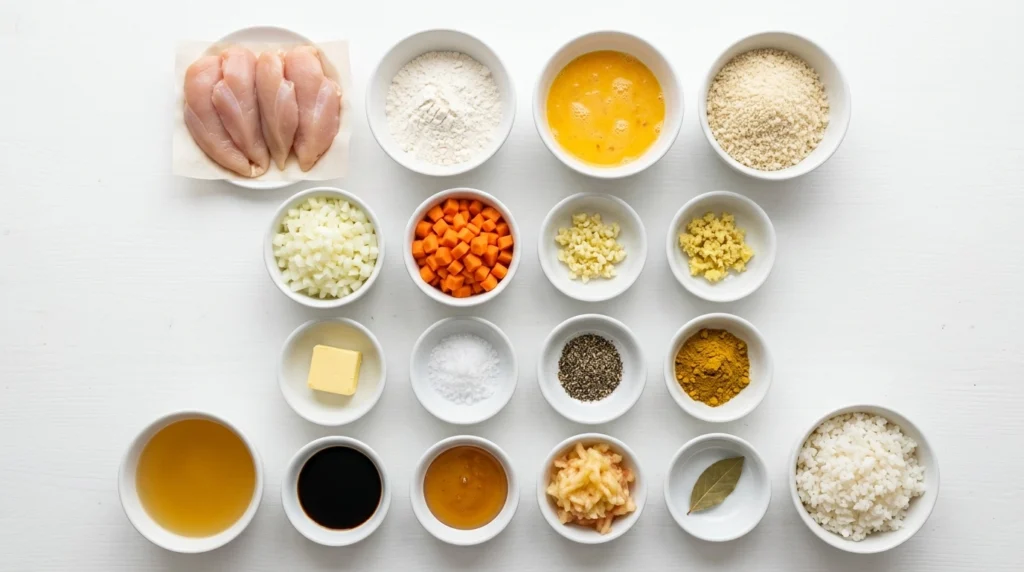
- 2 large boneless, skinless chicken breasts, halved horizontally
- 1/2 teaspoon salt
- 1/4 teaspoon black pepper
- 1/2 cup all purpose flour
- 2 large eggs, beaten
- 1 1/2 cups panko breadcrumbs
- Oil, for frying
For the Curry Sauce
- 2 tablespoons butter
- 1 small onion, diced
- 1 carrot, diced
- 2 garlic cloves, minced
- 1 teaspoon fresh ginger, minced
- 2 tablespoons curry powder
- 2 tablespoons all purpose flour
- 2 cups chicken broth
- 1 tablespoon soy sauce
- 1 tablespoon honey
- 1/4 cup grated apple
- 1 bay leaf
For Serving
- 4 cups cooked steamed rice
Ingredient Notes: Panko breadcrumbs, rather than standard breadcrumbs, are what give katsu curry its signature light, extra crispy coating, since their larger, airier flakes fry up crunchier. Grated apple is a classic addition to Japanese curry sauce, contributing natural sweetness and a subtle depth that plain sugar cannot quite replicate.
Tip: Pound the chicken breasts to an even 1/2 inch thickness before breading, since uneven pieces will cook unevenly no matter how carefully you fry them.
Equipment Needed
- Large skillet – fries the breaded chicken cutlets until golden and crisp
- Saucepan – builds and simmers the curry sauce
- Three shallow dishes – for the flour, egg, and panko breading station
- Wire rack – lets the fried chicken drain without turning soggy
Practical Tip: Set up your breading station in a line, flour first, then egg, then panko, so you can move each piece of chicken through the process without doubling back or dirtying extra dishes.
Preparation
Before you start, pound the chicken breasts to an even thickness between two pieces of plastic wrap, then season both sides with salt and pepper. Set up your breading station with the flour, beaten eggs, and panko in three separate shallow dishes.
Dice your onion and carrot for the curry sauce, and grate your apple so everything is ready to go once you start cooking, since the sauce comes together quickly once it starts.
Step by Step Instructions
- Start the curry sauce. Melt the butter in a saucepan over medium heat and add the onion and carrot, cooking for 5 to 6 minutes until softened.
- Add aromatics and spice. Stir in the garlic and ginger, cooking for 30 seconds, then add the curry powder and flour, stirring constantly for 1 to 2 minutes. Cooking the curry powder and flour together in the butter for that full minute or two is what blooms the spices and removes any raw flour taste, so this short step matters more than it looks.
- Build the sauce. Slowly whisk in the chicken broth, then add the soy sauce, honey, grated apple, and bay leaf, stirring until smooth.
- Simmer the curry. Bring to a gentle simmer and cook for 10 to 12 minutes, stirring occasionally, until the vegetables are tender and the sauce has thickened enough to coat the back of a spoon.
- Bread the chicken. Dredge each chicken piece in flour, shaking off the excess, then dip in beaten egg, then press firmly into the panko breadcrumbs to coat both sides evenly. Pressing the panko on firmly, rather than just laying the chicken in the crumbs, is what keeps the coating from flaking off in the hot oil.
- Fry the cutlets. Heat about 1/2 inch of oil in a large skillet over medium high heat and fry the chicken for 3 to 4 minutes per side, until deeply golden and the internal temperature reaches 165°F.
- Drain the chicken. Transfer the fried cutlets to a wire rack rather than paper towels, letting them rest for a couple of minutes before slicing.
- Assemble and serve. Slice the chicken into strips, plate over steamed rice, and ladle the curry sauce over or alongside.
Expert Tips & Tricks
- Pound the chicken evenly. The first time I skipped this step, one side of my cutlet cooked through before the other, so now I always take the extra minute to even out the thickness.
- Do not rush the roux. That minute or two of cooking curry powder and flour together builds real depth that raw spice simply cannot match.
- Press the panko on firmly. A gentle press with your hand helps the crumbs stick properly instead of falling off in the oil.
- Use a wire rack for draining. Paper towels trap steam underneath the coating and soften it, while a wire rack keeps the chicken crisp on every side.
- Grate the apple fresh. Pre-made applesauce works in a pinch, but freshly grated apple gives a brighter, less processed sweetness to the curry sauce.
- Make the curry sauce ahead. It reheats beautifully and, like many curries, tastes even better after a day in the fridge.
- Slice just before serving. Cutting the chicken right before plating keeps that crispy coating intact for as long as possible.
Common Mistakes & Troubleshooting
Soggy panko coating: This usually comes from oil that was not hot enough, or chicken that was not dried before breading, both of which trap moisture under the crust. Make sure your oil is properly hot before frying, and pat the chicken dry with a paper towel before starting the breading process.
Curry sauce too thin: Not cooking the roux long enough, or adding the broth too quickly, can leave the curry sauce thinner than expected. Cook the curry powder and flour together for the full minute or two, and whisk in the broth gradually rather than all at once.
Bland curry flavor: Skipping the roux blooming step is the most common cause of a flat tasting sauce, since raw curry powder simply does not taste the same as spices cooked briefly in fat. Always give the curry powder and flour that short cooking time before adding any liquid.
Chicken overcooked or dry: Uneven thickness, or frying longer than necessary, both lead to drier chicken. Pound the cutlets to an even thickness before breading, and pull them from the oil as soon as they reach 165°F.
Breading falls off during frying: Skipping a step in the breading station, or not pressing the panko on firmly enough, leaves gaps where the coating can separate. I learned this after rushing through the process once and watching half the crust slide off in the pan, so now I always press each piece firmly into the panko before it goes anywhere near the oil.
Storage Instructions
- Room Temperature: Do not leave the dish out longer than 2 hours.
- Refrigerator: Store the curry sauce and fried chicken in separate airtight containers for up to 4 days.
- Freezer: Freeze the curry sauce alone for up to 3 months; the fried chicken is best enjoyed fresh but can be frozen for up to 1 month.
- Reheating: Reheat the curry sauce on the stovetop, and refresh the chicken in an oven or air fryer at 375°F for 5 to 7 minutes to restore crispness.
- Make Ahead: The curry sauce can be made up to 2 days in advance, with the flavor often improving after a day in the fridge.
- My storage tip: I always store the chicken and curry sauce separately, even for same day leftovers, since the sauce softens the coating almost immediately once they touch.
Variations & Substitutions
- Extra spicy version: Add 1/4 teaspoon of cayenne pepper to the curry sauce, or use a spicier Japanese curry roux block in place of curry powder, for a noticeably hotter dish.
- Mild, kid friendly version: This recipe is already fairly mild as written, but reducing the curry powder slightly and adding an extra touch of honey makes it even gentler.
- Vegetarian version: Bread and fry thick slices of eggplant or firm tofu in place of the chicken, using vegetable broth for the curry sauce.
- Gluten free version: Use a gluten free flour blend and gluten free panko style breadcrumbs, along with a gluten free soy sauce alternative.
- Other substitutions: Use thin pork cutlets instead of chicken for a traditional tonkatsu style version, or add cubed potato to the curry sauce for a heartier dish.
Serving Suggestions
Katsu curry is a complete meal on its own, but a few extras round it out.
- Pickles: Japanese pickled ginger or a simple quick pickled cucumber for contrast
- Salad: A side salad with a light sesame dressing balances the richness
- Soup pairing: Serve alongside wonton soup for a fuller Asian inspired meal
- Garnishes: A sprinkle of sliced scallions over the curry sauce
- Meal combinations: Explore more main dish recipes for other comforting dinner options
Meal Prep Tip: I regularly make a double batch of curry sauce and freeze half, so I only need to bread and fry fresh chicken the next time this craving hits.
Frequently Asked Questions
Can I make katsu curry ahead of time?
Yes, the curry sauce can be made up to 2 days in advance and often tastes even better once the flavors have had time to settle in the fridge. The chicken is really at its best fried fresh, since the crispy coating softens the longer it sits, so I recommend making the sauce ahead and frying the cutlets closer to when you plan to eat.
Why does my panko coating fall off the chicken?
This almost always comes down to skipping a step in the breading process or not pressing the panko firmly enough onto the chicken. Make sure each piece goes through flour, then egg, then panko in that order, pressing the crumbs on with your hand so they adhere properly before the chicken hits the hot oil.
Can I use pork instead of chicken for katsu curry?
Absolutely, thin pork cutlets are actually the traditional protein in tonkatsu, the dish this recipe borrows its technique from. The breading and frying process stays exactly the same, just adjust the cook time slightly based on the thickness of your pork cutlets and confirm they have reached a safe internal temperature.
Why is my Japanese curry sauce too thin?
A thin curry sauce usually means the roux, the mixture of curry powder and flour cooked in butter, did not get enough time on the heat before the broth was added. Cook that mixture for the full minute or two, and whisk in the broth gradually rather than pouring it all in at once, letting the sauce simmer until it visibly thickens.
Why does my katsu curry taste bland compared to restaurant versions?
Bland curry sauce almost always points back to rushing or skipping the step where curry powder and flour cook together in butter before any liquid is added. That short blooming step is where a lot of the real flavor develops, so giving it the full minute or two, along with a properly seasoned chicken cutlet, usually closes the gap with restaurant versions.
Conclusion
Katsu Curry proves that a dish this satisfying does not require a trip to a restaurant, just a proper breading station and a simple roux based curry sauce built from pantry staples. What makes this one worth the extra steps is that contrast between the crunchy cutlet and the silky, gently spiced sauce, a combination that genuinely rivals anything from a delivery menu. Make a batch this week, and you will likely find yourself reaching for this katsu curry the next time that craving hits instead of the takeout app.
For more easy main dish recipes like this one, follow along on Pinterest at MyRecipesDiary.

Katsu Curry Recipe
Ingredients
Equipment
Method
- Sauté onion and carrot in butter, then add garlic and ginger.
- Stir in curry powder and flour, cooking 1 to 2 minutes.
- Whisk in broth, soy sauce, honey, apple, and bay leaf; simmer 10 to 12 minutes.
- Bread chicken in flour, egg, then panko, pressing firmly.
- Fry cutlets 3 to 4 minutes per side until golden and 165°F.
- Drain on a wire rack, slice, and serve over rice with curry sauce.
Notes
- Pound the chicken to an even thickness for consistent frying.
- Press the panko firmly onto the chicken so the coating does not flake off in the oil.
- Drain fried chicken on a wire rack instead of paper towels to keep the coating crisp.
- A large skillet gives the cutlets enough room to fry without crowding the pan.