Manchurian Recipe

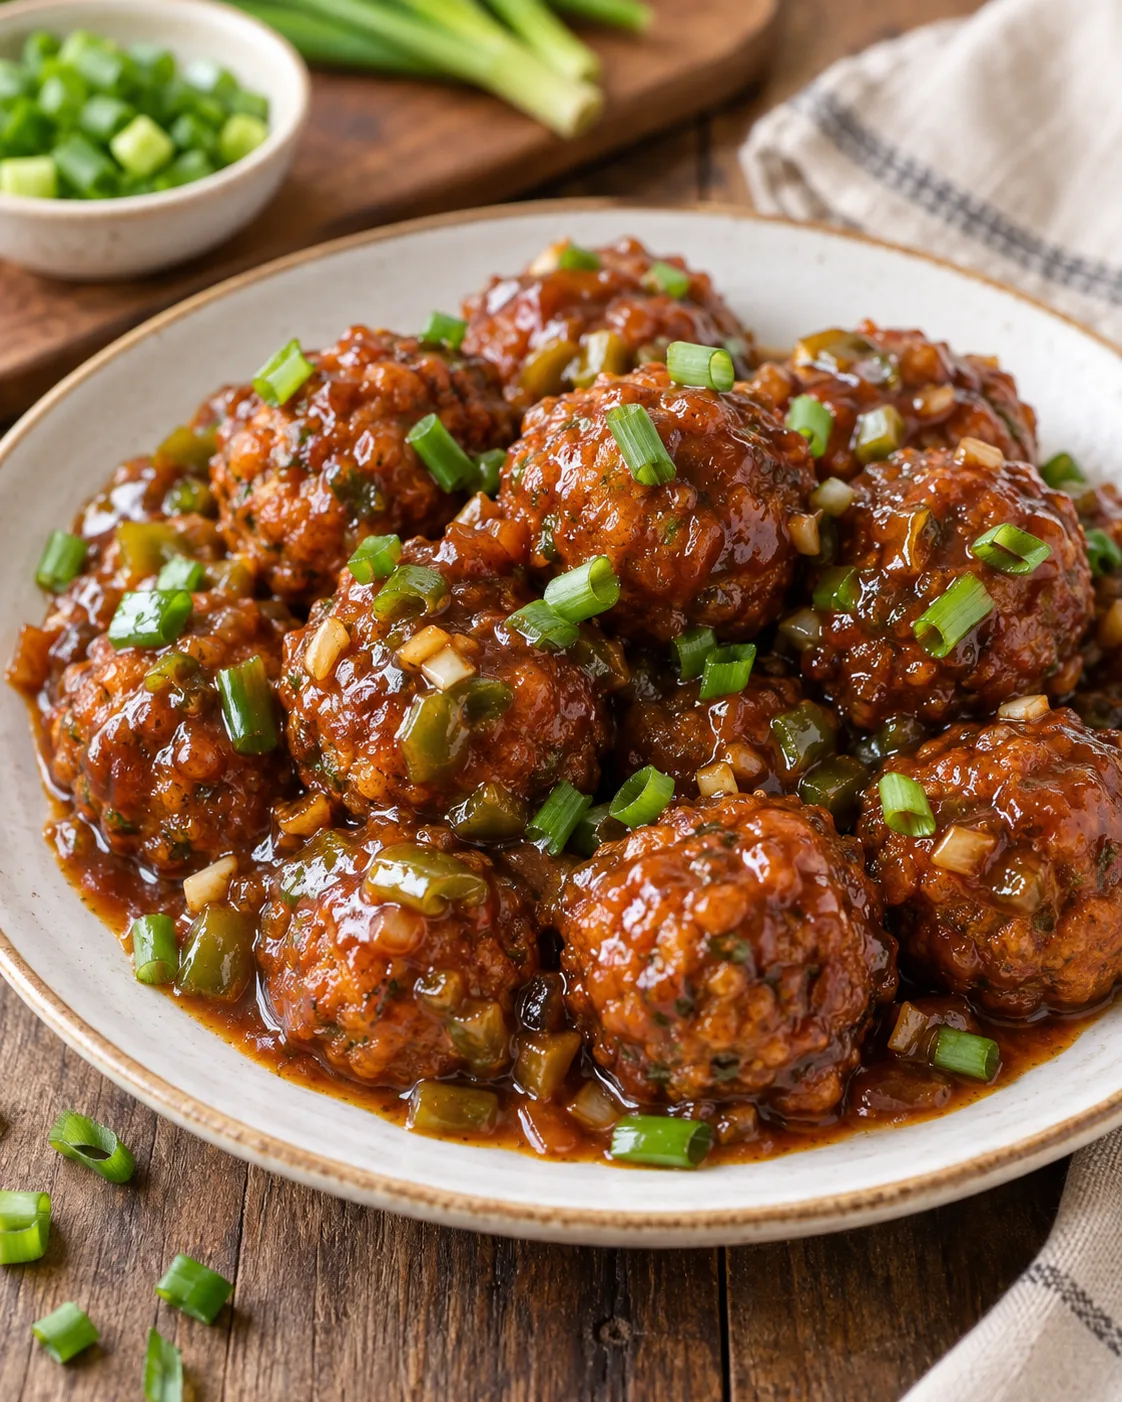
Crispy fried vegetable balls tossed in a glossy, tangy, garlicky sauce is the kind of dish that makes ordering takeout feel completely unnecessary once you know how simple it is to make at home. Manchurian Recipe brings that classic Indo-Chinese street food flavor into your own kitchen, balancing sweet, sour, and spicy in one irresistible sauce.
I started making this after realizing how much better it tastes fresh, with the balls staying properly crisp instead of arriving softened from a delivery container. The real secret is timing, frying the vegetable balls until deeply golden and only tossing them into the sauce right before serving so that signature crunch survives the coating. Once you taste that first bite of crispy exterior giving way to a tender, savory center, you will understand exactly why this dish disappears from the table so quickly.
Vegetable Manchurian Recipe
Why You’ll Love This Recipe
- Restaurant quality flavor made entirely from scratch at home
- That perfect balance of sweet, sour, and spicy in every bite
- Crispy fried texture that holds up beautifully under the glossy sauce
- Naturally vegetarian, built entirely from fresh vegetables and pantry sauces
- Great as an appetizer or main, served plain or over rice or noodles
- Easy to customize with your preferred spice level or added protein
Quick Information
- Prep Time: 20 minutes
- Cook Time: 25 minutes
- Total Time: 45 minutes
- Servings: 4
- Difficulty: Medium
- Calories: 280 per serving
- Important Tool: A deep pan or wok for frying
- Best For: Appetizers, party starters, or a side with fried rice or noodles
- Course: Appetizer
- Cuisine: Indo-Chinese
- Category: Stir-Fry
Nutrition Information
- Calories: 280
- Protein: 6g
- Carbohydrates: 32g
- Fat: 14g
- Fiber: 3g
- Sugar: 8g
- Sodium: 620mg
- Serving Size: About 6 pieces with sauce
- Servings Per Recipe: 4
Most of the calories in this dish come from the frying oil absorbed by the vegetable balls, which can be reduced slightly by draining them well before adding to the sauce. The sodium reflects the soy sauce and other condiments used in the glaze, so a low sodium soy sauce is an easy way to bring that number down.
Nutrition information is an estimate calculated from standard ingredient values and will vary based on specific brands and portion sizes used.
Ingredients
For the Vegetable Balls
- 2 cups finely shredded cabbage
- 1/2 cup grated carrot
- 1/4 cup finely chopped capsicum
- 2 tablespoons finely chopped onion
- 1 teaspoon minced garlic
- 1/4 cup all purpose flour
- 3 tablespoons cornflour
- 1/2 teaspoon salt
- 1/4 teaspoon black pepper
- Oil, for deep frying
For the Sauce
- 2 tablespoons oil
- 1 tablespoon minced garlic
- 1 teaspoon minced ginger
- 1 to 2 green chilies, finely chopped
- 3 tablespoons chopped spring onion, white parts
- 2 tablespoons soy sauce
- 2 tablespoons tomato ketchup
- 1 tablespoon red chili sauce
- 1 teaspoon vinegar
- 1 teaspoon sugar
- 1 cup water
- 1 tablespoon cornflour mixed with 2 tablespoons water, for the slurry
- Spring onion greens, for garnish
Ingredient Notes: Squeezing the shredded cabbage and grated carrot with your hands before mixing removes excess moisture, which helps the vegetable balls hold together better while frying. A mix of soy sauce, ketchup, and red chili sauce is what gives the glaze its signature sweet, sour, and spicy balance, so avoid skipping any one of the three.
Callout Box — Ingredient Tip: If you want a milder sauce without losing that classic flavor, reduce the red chili sauce slightly and add a touch more ketchup to keep the balance sweet rather than sharp.
Equipment Needed
- Deep pan or wok – for frying the vegetable balls until golden and crisp
- Mixing bowl – for combining the shredded vegetables and binding ingredients
- Slotted spoon – lifts the fried balls out while leaving excess oil behind
- Small bowl – for mixing the cornflour slurry used to thicken the sauce
- Wok or large skillet – for building and simmering the sauce
Practical Tip: Frying in two batches rather than crowding the pan keeps the oil temperature steady, which is the difference between evenly golden vegetable balls and unevenly cooked ones.
Preparation
Before you start, shred the cabbage and grate the carrot, then squeeze both firmly over the sink or a bowl to remove as much excess water as possible. This step matters more than it seems, since watery vegetables make the mixture too loose to hold its shape while frying.
Prepare your cornflour slurry and measure out the sauce ingredients ahead of time, since the sauce comes together quickly once it starts cooking and you will not have time to measure mid-step.
Step by Step Instructions
- Mix the vegetable balls. In a large bowl, combine the shredded cabbage, carrot, capsicum, onion, garlic, flour, cornflour, salt, and pepper, mixing just until it holds together.
- Shape the balls. Divide the mixture into small portions and shape into balls about 1 inch in diameter.
- Heat the oil. Heat oil for deep frying in a wok or deep pan to 350°F (175°C).
- Fry until golden. Fry the vegetable balls in batches for 3 to 4 minutes, until deeply golden brown and crisp, then drain on a paper towel lined plate.
- Start the sauce. In a separate pan, heat the oil and sauté the garlic, ginger, and green chilies for 30 seconds until fragrant.
- Add the spring onion. Stir in the chopped spring onion whites and cook for 1 minute.
- Build the sauce. Add the soy sauce, ketchup, red chili sauce, vinegar, sugar, and water, stirring to combine, and bring to a simmer.
- Thicken the sauce. Stir in the cornflour slurry and cook for 1 to 2 minutes, until the sauce thickens and coats the back of a spoon.
- Combine and serve. Add the fried vegetable balls to the sauce just before serving, tossing gently to coat, then garnish with spring onion greens.
Chef’s Note: Add the fried balls to the sauce only right before serving, since letting them sit in the sauce too long softens that crisp exterior you worked to build.
Chef’s Note: The sauce is ready once it thickens enough to coat the back of a spoon and hold a line when you run your finger through it, rather than running off immediately.
Chef’s Note: Fry in small batches and let the oil return to temperature between rounds, since overcrowding drops the oil temperature and leads to greasy, pale results instead of crisp, golden ones.
Expert Tips & Tricks
- Squeeze the vegetables dry. The first time I skipped this step, my mixture was too wet to hold its shape, so now I always squeeze the shredded vegetables firmly before mixing.
- Use cold water for the slurry. Mixing cornflour with cold water rather than warm prevents lumps from forming when it hits the hot sauce.
- Fry in small batches. Crowding the pan drops the oil temperature and leaves the balls greasy instead of crisp, so patience here pays off.
- Taste the sauce before adding balls. Adjust the sweet, sour, and spicy balance to your liking before tossing in the fried vegetable balls, since it is much easier to fix the sauce alone.
- Make extra balls ahead. Shape and freeze uncooked vegetable balls on a tray, then transfer to a bag, so a quick batch is always ready to fry from frozen.
- Toss just before serving. This single timing choice is what keeps the texture crisp instead of soggy, so avoid combining everything too far in advance.
- Save time on prep. A food processor makes quick work of shredding the cabbage and carrot if you do not want to do it by hand.
Common Mistakes & Troubleshooting
Balls falling apart while frying: This usually means the mixture had too much moisture or not enough cornflour to bind it together. Squeeze the shredded vegetables thoroughly before mixing, and add an extra tablespoon of cornflour if the mixture still feels loose.
Soggy manchurian after serving: Adding the fried balls to the sauce too early, or letting the dish sit before serving, softens the crisp exterior quickly. Always combine the balls and sauce as close to serving time as possible.
Sauce too thin or too thick: An incorrect ratio of cornflour slurry to sauce liquid is the most common cause here. Add the slurry gradually while stirring, checking the consistency as you go rather than adding it all at once.
Bland tasting sauce: Skimping on garlic and ginger, or under-seasoning the sauce base, leaves the final dish tasting flat despite all the right ingredients. Cook the garlic, ginger, and chilies until fragrant before adding the sauces, and taste before adding the fried balls.
Uneven frying: Overcrowding the pan or frying at the wrong oil temperature leads to some balls turning dark while others stay pale. I learned this after rushing an entire batch into the oil at once, so now I always fry in smaller rounds with room for each ball to cook evenly.
Storage Instructions
- Room Temperature: Best served immediately; do not leave out longer than 1 hour.
- Refrigerator: Store fried balls and sauce separately in airtight containers for up to 2 days.
- Freezer: Freeze uncooked shaped vegetable balls on a tray, then transfer to a bag, for up to 2 months.
- Reheating: Reheat fried balls in an air fryer or oven at 375°F (190°C) for 5 to 7 minutes to restore crispness, then toss with reheated sauce just before serving.
- Make Ahead: The sauce can be made up to 2 days in advance and reheated gently on the stovetop.
- My storage tip: I always store leftover balls and sauce in separate containers, since combining them ahead of time turns the crisp coating soft almost immediately.
Variations & Substitutions
- Spicy version: Add an extra green chili or an additional tablespoon of red chili sauce for a sharper, spicier glaze.
- Mild, kid friendly version: Reduce the red chili sauce and green chilies, and add a touch more ketchup to lean the sauce sweeter and milder.
- Protein added version: Add pan seared paneer or crispy tofu cubes to the sauce alongside the vegetable balls for extra protein.
- Gluten free version: Use a gluten free soy sauce alternative such as tamari, and confirm your chili sauce and ketchup are labeled gluten free.
- Other substitutions: Swap the deep fried balls for a baked version at 400°F for 20 minutes, flipping halfway, for a lighter take on the same flavor.
Serving Suggestions
Manchurian works well both as a starter and as part of a larger meal.
- Mains: Serve over fried rice or hakka noodles for a complete dinner
- Appetizer style: Serve with toothpicks as a party starter alongside other Indo-Chinese bites
- Sauces: Extra chili garlic sauce on the side for those who want more heat
- Garnishes: Extra spring onion greens or toasted sesame seeds scattered on top
- Meal combinations: Pair with a simple cucumber salad for a lighter, balanced plate
Callout Box — Meal Prep Tip: I regularly shape and freeze a double batch of uncooked vegetable balls, so a fresh, crispy plate of manchurian is only a fry and a quick sauce away on busy nights.
Frequently Asked Questions
Can I make manchurian ahead of time?
You can make the sauce up to 2 days in advance and store it in the refrigerator, reheating it gently on the stovetop when ready to serve. The vegetable balls can also be shaped and frozen uncooked ahead of time, ready to fry straight from frozen. I would avoid combining the fried balls and sauce until right before serving, since that is what keeps the texture crisp.
Why do my manchurian balls fall apart while frying?
This almost always comes down to too much moisture in the vegetable mixture or not enough cornflour to hold everything together. Squeeze the shredded cabbage and carrot firmly before mixing, and add an extra tablespoon of cornflour if the mixture still feels loose or wet. A properly bound mixture should hold its shape easily when rolled into a ball.
Can I bake instead of deep frying the vegetable balls?
Yes, you can bake them at 400°F (200°C) for about 20 minutes, flipping halfway through, though the texture will be noticeably less crisp than the fried version. Lightly brushing or spraying the balls with oil before baking helps them brown more evenly. Frying still gives the most authentic result if you have the time.
How do I make the sauce thicker or thinner?
To thicken the sauce, add a bit more cornflour slurry a teaspoon at a time and simmer for another minute until it reaches your preferred consistency. To thin it out, stir in a splash of water and simmer briefly to combine. Adjust gradually rather than all at once, since cornflour thickens quickly as it heats.
Why does my manchurian turn soggy after sitting?
Manchurian turns soggy when the crispy fried balls sit in the sauce for too long before serving, since the sauce naturally softens the coating over time. The fix is simple: combine the balls and sauce only right before you plan to eat, rather than letting the finished dish sit on the counter. If you are serving a crowd, keep the sauce and balls separate until the last possible moment.
Conclusion
Manchurian Recipe proves that this Indo-Chinese favorite is well within reach at home, delivering that same crispy, saucy, craveable bite you would expect from your favorite takeout spot. What makes this version worth the extra effort is how much better the texture holds up when everything is tossed together fresh, right before serving. Make a batch for your next gathering and you will likely find yourself fielding requests for the recipe before the plate is even empty.
For more easy Indo-Chinese recipes like this one, follow along on Pinterest at MyRecipesDiary.

Manchurian Recipe
Ingredients
Equipment
Method
- Mix shredded vegetables with flour, cornflour, salt, and pepper; shape into balls.
- Deep fry at 350°F until golden, 3 to 4 minutes; drain.
- Sauté garlic, ginger, and chilies, then spring onion whites.
- Add soy sauce, ketchup, chili sauce, vinegar, sugar, and water; simmer.
- Thicken with cornflour slurry until it coats a spoon.
- Toss fried balls in the sauce just before serving and garnish.
Notes
- Squeeze excess water from shredded vegetables before mixing so the balls hold together while frying.
- Combine the fried balls and sauce only right before serving to keep the texture crisp.
- Fry in small batches to maintain oil temperature and even browning.
- Use a deep pan or wok for frying, since it holds heat steadily and gives the balls room to cook evenly.